
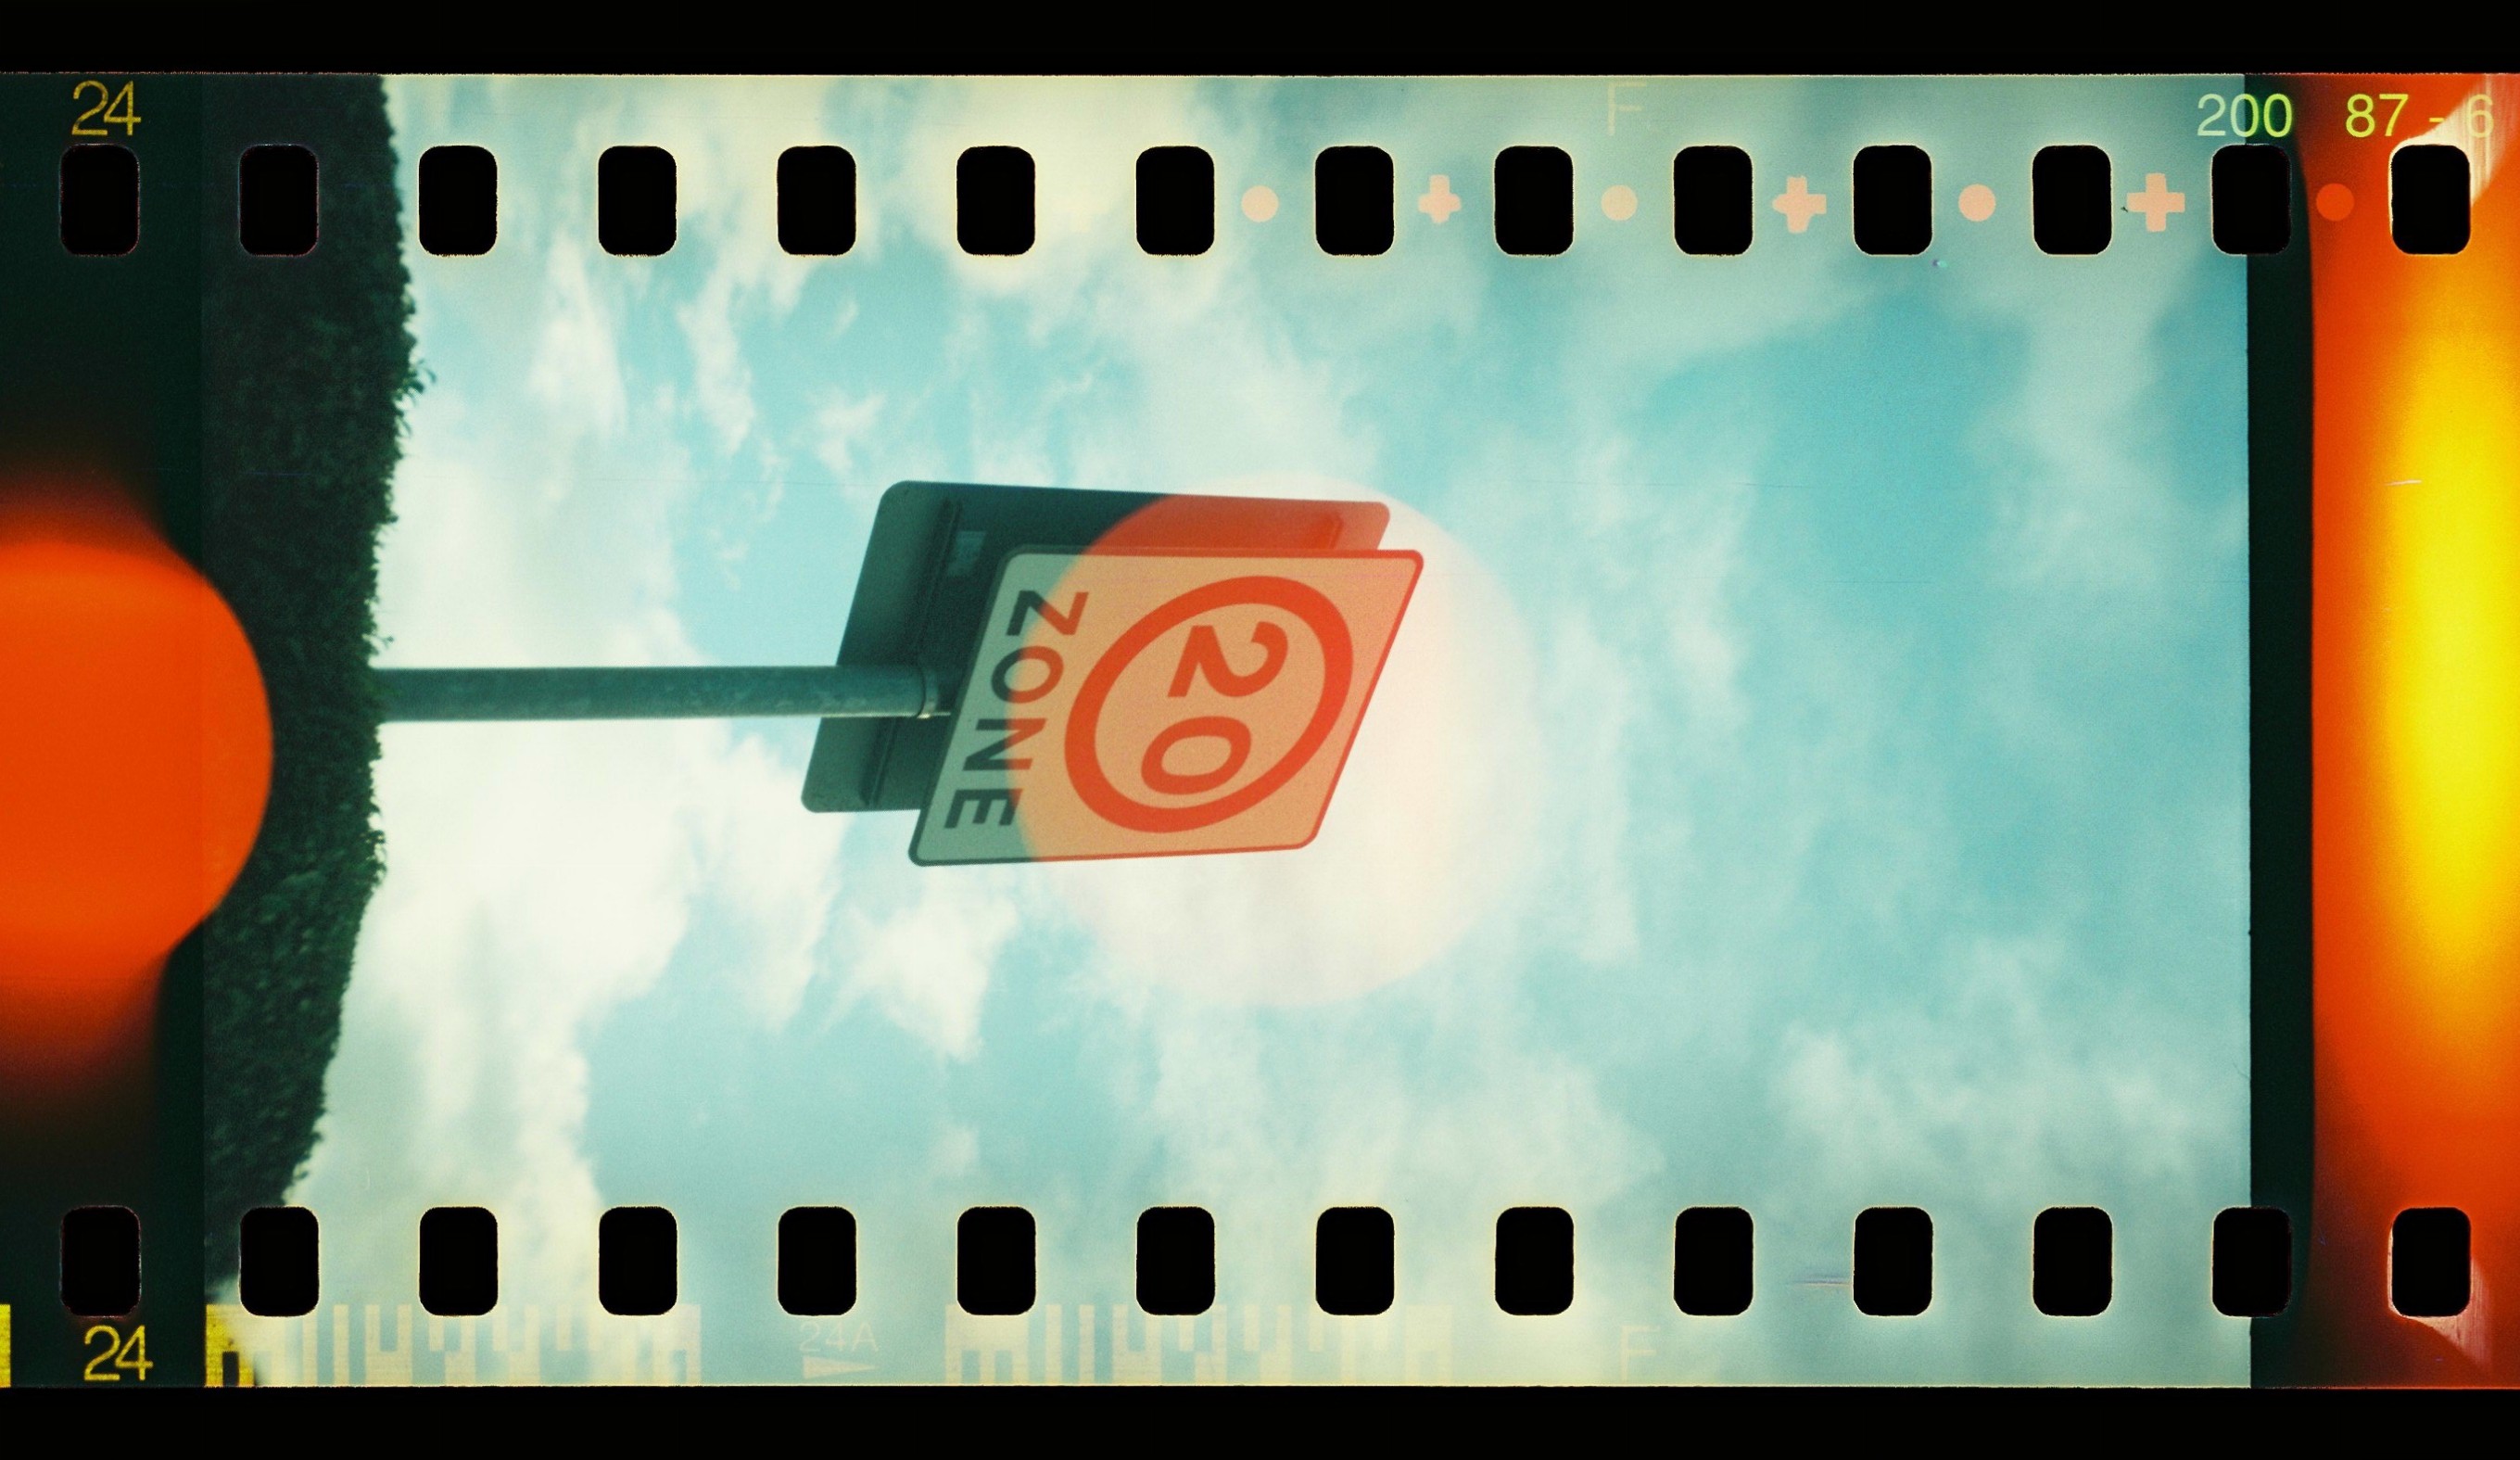
I love shooting on 120 cameras and sneakily you can also shoot 35mm on many of them. This allows you to get neat effects like a sprocket shot.

Modern Lo-fi cameras like the Diana F+ and the Holga 120 series have cottoned on to this and actually make 35mm film backs but even with them you can use 35mm film without them
There are some caveats however. Not all cameras will be able to do this and you’ll also (unless double cartridging) have to be happy to open and empty the film in a total dark conditions. Also don’t do this for mission critical stuff (esp first time out) – I still make errors.
However I’ve done this with loads of Camera from a pre-WWII Brownie No 2 right through to a brand new Holga. The mechanism is broadly the same
Step 1 – Check Your Camera is Suitable
There are 2 potential issues that may mean you can’t use your camera. Firstly you must be able to fit a 135 (35mm) film cartridge into the side where a 120 roll would be loaded and close the back of the camera. Secondly you must use a camera where the film plane is flat (some cameras like the Halina 6-4 used a curved film plane to improve focus)
Step 2 – Light tight your camera
Hang on you say – it all ready is ! Well it is for 120 film but remember the red windows on the back. These are used to read and align the frame numbers on the light tight backing paper (the red reduces the amount of light). If you don’t cover when loaded with 35mm which has no backing paper you’ll get a major light leak.
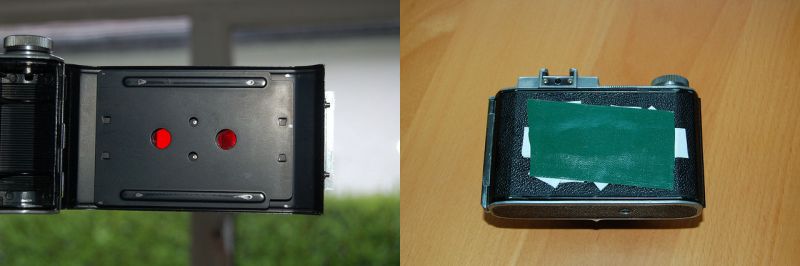
Many folk use electrical tape available at most hardware stores and some supermarkets. Make sure you layer well and check you can’t see light though. Gaffer tape is seen as alternative as easier to remove but is less light tight so you really need to layer well.
Step 3 – Work out Winding distance
Your camera is now ready but you have no way of determining how far you should wind for each frame.

Easiest way to do this is firstly ensure you film winding nob has an obvious visual marker (a Wee sticker is handy). Then take a cut longways strip of A4 paper and attach to the film take up spool just like you would when loading film. Gently tension by one hand so that it lies flat across the film plane and mark it a couple of millimetres before the film plane. Keeping gentle tension and watching how far you wind on until the mark crosses and exits the film plane. You have now got your starting wind distance.
Step 4 -Loading
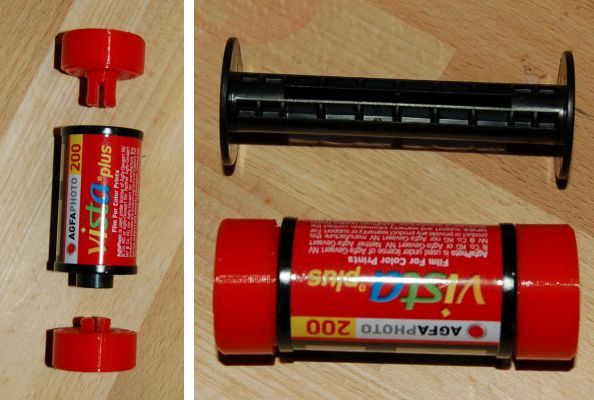
You’ll need to secure your 135 (35mm) film cassette in the film compartment. Some cameras like the Bencini Koroll 24s will fit snugly but for most camera you will need to wedge in the film cassette somehow. Simplest solution IMHO is to get a set of 35mm to 120 converter Lugs for a few quid (for those with a 3D printer you can print your own). You can do other solutions and DIY photography has some other suggestions and a link to one 3d printer template.
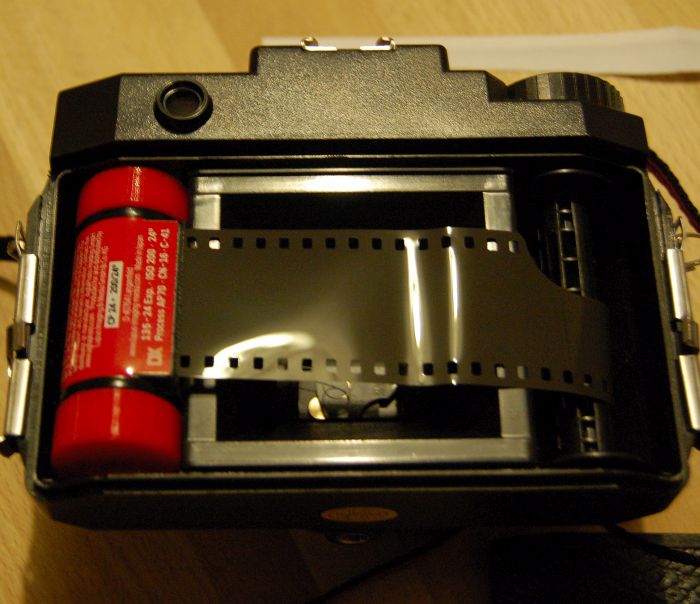
Then just load your film as you would do with a 120 spool making sure the cartridge slot is facing the right way (nearest to film plane). I find bending back the film leader once you pass into the empty sprocket helps secure and you want to gently wind around the take up spool. Wind on to secure and Close the back. I’d then wind on by 1 ½ times the initial wind distance (twice or more for box cameras) to get passed any exposed film.
Step 5 – Shooting
You won’t need to make any adjustments for shooting 35mm in terms of focus or exposure but be aware the viewfinder will still be geared for 120 shots not a narrower 35mm.
Step 6 – Winding on
Once you’ve taken your first shot wind on by the initial wind distance. As you progress through the roll you will over time need to wind on a bit less (as the film winds around the take up spool it gets thicker and thicker) but the reduction has to be small (I drop a 1/8 of a turn every 4-6 shots for most cameras but it is a matter of try it and see)). If in doubt don’t reduce (you’ll only lose a shot at most so no great panics). Remember just as when shooting on a 35mm camera you will hit a point where the 135 cassette runs out and you can’t wind on – just don’t force it.
In terms of shot number using a 6x6cm mask non box 120 camera you can expect roughly half the number of exposures of your 35mm cartridge. A 24 Exposure roll if you meaured just the length of a film exposed area would be 864mm (36×24) long. This is just a bit longer than the exposed length of 12 shots at 6×6 on a 120 roll (720mm). You’ll lose a bit of length loading the camera and even if you do well in judging the change of each frame you’ll probably be over the mark
Box cameras will waste an extra 20-30cm of film due to their long loading route.
Step 7 – Unloading
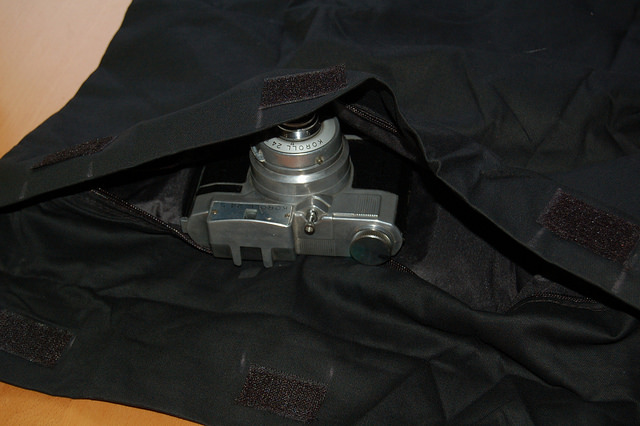
When you reach the end you’ll need to empty the camera in total darkness (unless using the second cassette technique below). Not many of us have a proper darkroom so personally I’d invest in a light tight changing bag (if you shoot film you’ll need it even if not being too adventureous). You can usually get on eBay (mine was about £7 most are £10-20). If you don’t have one you can still change the camera by making an improvised light tight environment although be aware the slightest amount of light while cause a leak. You can try and do this in your bedroom ideally at night when light levels are low. Close the door and close curtains. I’d put the camera under the duvet (I still do this with my change bag just to be safe) and put additional blankets etc on top.
Remember to take off any watches with luminous dials which ever way you do it. Open the back and try to avoid touching the film. Fee up the take up spool and the film cassette. Rewind the film back into the cassette.
Step 8 Processing and Scanning
There is good news and bad news here. The good news is that you can have your film processed in any lab that deals with the film type, so you could still get it done in a cheap. Scanning the film is going to be more of an issue. Many cheap labs automate scanning and won’t cope with a wider width negative size. Even some more pro labs won’t sprocket scan. However if you hunt around you’ll find folk who do.
I personally tend to use commonest (C-41) negative film for sprocket. The nice folk at Digital Photo Express in Carlisle on Fisher Street do my sprocket developing & scanning (the do the film on their 120 masks) but they can only do C41 or crossprocess E6. West End Cameras in London also offer a sprocket service (never used them for that but was happy with standard prints from them). Of course you can use a cheap lab and home scan if you can (just ask them not to cut your negative)
Hints & Tips
-
Cassette to Cassette transfer
One of the issues with our core technique above is that the camera can’t be unloaded easily. For the adventurous (probably happy home developing) you can get round this by setting the camera up with the film attached not to an empty spindle but into another (empty) 35mm cassette. At the end of the roll you can just detach/cut the film off from the initial roll. You’ll again need to make sure the camera has both a film and a take up compartment that’ll take 35mm cassettes.
-
Get a system for remembering shots
You’ve no way of knowing how many shots you’ve taken. Many vintage and modern 120 P&S camera have no multiple exposure locks so get into a system of either winding on after or before every shot.
-
This ain’t for wide boys
You might be thinking this is a cool alternative to things like lomography’s sprocket rocket. It is if you want sprockets but not if you want that ultrawide angle effect. Most 120 P&S will have lenses that match the angle of the eye or are slightly wide. But that’s for 120 film. You’ll often find you’re shooting off a 70mm lens which is 1.5x telephoto compared to the angle of the human eye
Will this work with my Diana+ 120 film camera from lomography?
Yes you can broadly use this with the Diana F+. The only issue is the film compartment is bigger (it is designed to allow the fitting of 35mm film using the expensive dedicated adaptor). So if you’re doing it without the adaptor you need to secure your 35mm film. If you plan on doing this a lot you can pick up a set of 35mm to 120 adapter plugs that go on each end of the 35mm cannister. Alternatively use something like tissue to secure top and bottom (there’s a video on YouTube in Italian with English subtitles doing this). Don’t forget to mask the film count window and this post gives some idea how much to advance
Perhaps I could do something like this with my Nettar? I’m a bit resitant to the idea of a Holga unless I can find one for less than a tenner, or preferably a fiver.